HV Replication Monitor User Guide
Your solution for monitoring your Hyper-V Replica Environment
Open the HV Replication Monitor console
Opening the HV Replication Monitor console give you the ability to configure various options.
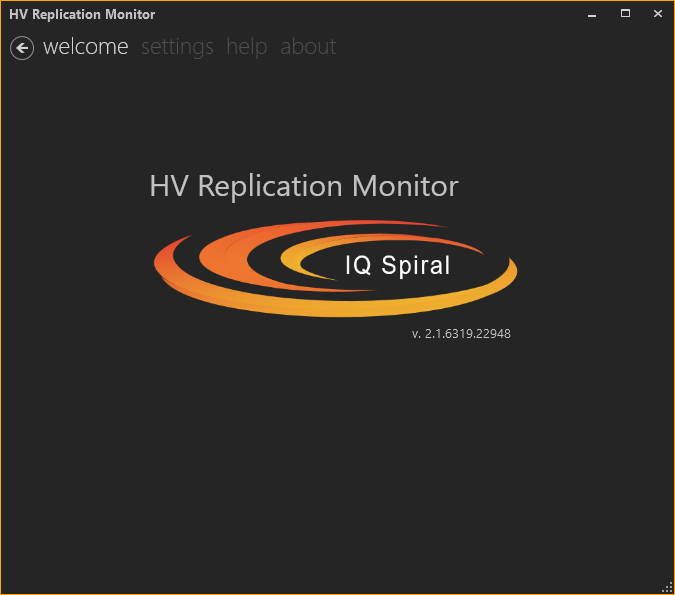
On the Welcome screen, you can find the version information below the logo.

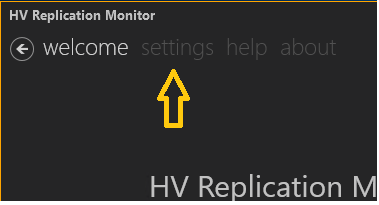
Configure the monitoring, select ‘Settings’.

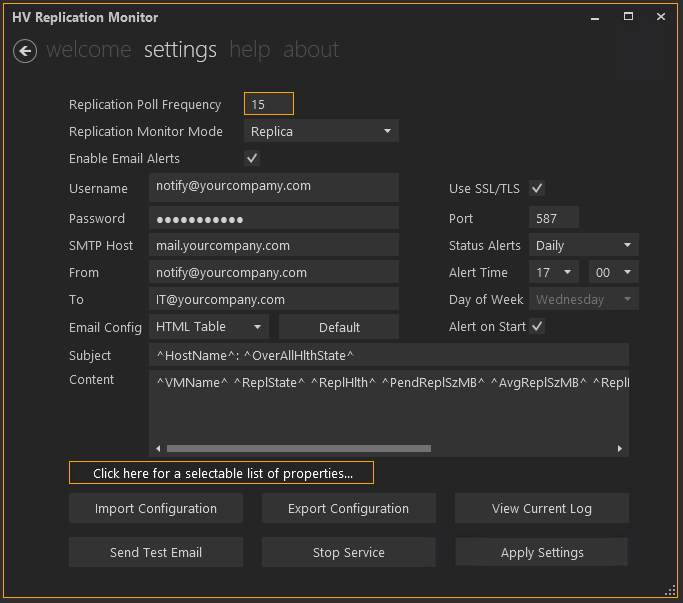
Configure the desired monitoring settings.

This interface is a graphical representation of all the configuration settings for the associated Windows Service, which has also been installed. To view the service, open the Services MMC (Microsoft Management Console):

Replication Monitoring
-
Replication Poll Frequency: Sets the desired time to wait, in minutes (0 to 1440), for the Monitor to check the state of replicas in Hyper-V. The default value is 15 minutes. 0 Disabled the Replication Poll Frequency which allows for cases where it may be desirable to only receive Status Updates (...more information on Status Updates below)
-
Replication Monitor Mode: Defines which type of replicas the service will monitor. There are 4 possible monitoring modes: Primary, Replica, ExtendedReplica, and All
-
'Primary' mode: The service will monitor only virtual machines which are considered “primary” to the host on which it is currently running. The primary replica is the virtual machine which is being replicated to another host. Primary mode monitors only virtual machines from the perspective of the primary host.
-
'Replica' mode: The service will monitor only virtual machines which are being received from another Hyper-V host. This is the default and the recommended mode of operation. Replica mode will allow alerting on broken replicas even if the primary host has completely failed and is offline.
-
If the replication topology is configured as 1-way setup, where the primary host only sends replicas to another host, considered the secondary (or replica host), install (at minimum), HV Replication Monitor on the replica host and leave the Monitor Mode set as ‘replica’. This ensures that should the primary become unresponsive, the replica will alert on the failure. However, It is highly recommended to always install HV Replication Monitor on all hosts, even if its monitoring capability is disabled. In this way, the software will be configured and available in the event a failover should be necessary.
-
If the replication topology is configured as a 2-way setup, where each host is both a primary and a replica, install HV replication Monitor on both hosts with each mode set to Replica. In this way, each host can be a witness to the other’s replicated virtual machines.
-
-
'ExtendedReplica' mode: The service will monitor virtual machines it is receiving which are of type Extended Replica.
-
'All' mode: The service will monitor all virtual machines setup for replication, whether they be sent or received. Be aware, when the software is installed on 2 hosts replicating to each other, set in “All Mode”, you will be alerted for a failure from both sides. Thus you will get notified twice for each failure or recovery event.
-
Email Configuration
-
Enable Email Alerts: Selecting this box allows you to configure and enable sending alerts via Email. If you configure alerting, but later wish to disable email alerts, deselect this box. Deselecting the box will preserve your alert configuration and continue logging without generating an email.
-
Username: This field is the username portion of the credential required to send an email via a mail server. Sometimes this can be simply a name like 'gsmith' or it can be an email address such as 'gsmith@example.com'.
-
Password: This field is the password portion of the credential required to send an email. This field stores the password using reversible encryption by means of the Windows machine key. This means that if the configuration file is exported or imported on the computer which generated it can re-use a previously saved password. If the configuration file for a given host is moved to another host, all configuration settings are readable except the password.
-
SMTP host: This is the name or IP of the mail server which will be sending email for your alerts. Most likely this will be a name, such as 'smtp.gmail.com' or 'smtp.office365.com'.
-
If you are having trouble sending test emails, ensure that your host can resolve the name supplied to an IP. To test name resolution, simply ping any potential mail server name to ensure the name resolves to an IP. Some mail servers may not respond to ping, but you can always use this command to ensure that a given name will resolve to an IP.
-
-
Use SSL/TLS: Most internet SMTP mail servers use encryption. Given a choice by your provider, select this box.
-
Port: Enter the port of your SMTP mail server here. Common ports are 25, 143, 465, 587, 993, 995, 2525, 2526.
-
From: Enter a 'From' address as follows:
-
A valid 'From' address: notify@exampleco.com
-
A validly formatted mail address which is non-replyable: no-reply@exampleco.com
-
Add a display name, examples:
-
“Alerts <no-reply@exampleco.com”
-
“Notification Example <somemail@exampleco.com>"
-
-
-
To: Any valid email address or addresses. To use more than one address, simply separate them by commas:
Configuring Alert Output
-
Email Config: This dropdown has 4 modes of operation. HTML Table, CSV Table, Custom Table, Custom Text. It defines the type of Content (or body) of the email.
-
HTML Table sends a preconfigured HTML formatted email. The email has been crafted using very basic HTML tags to provide a broader range of mail client render support. It was designed using GMAILs restrictions in formatted HTML mail messages. Google’s primary mail client is web-based. Thus, HTML emails could very easily be crafted with dangerous code which could interfere with GMAILs operation. The tags used for created tables are somewhat less efficient to accommodate broader compatibility.
-
CSV Table sends an email as a comma-separated values (CSV).
-
Custom HTML allows you to send an HTML formatted email with your own formatting.
-
Custom Text is free-form. You can type anything you want in the Content field.
-
-
Default: This button resets the Subject and Content fields to their default values.
-
Subject: Place anything you wish to type in the Subject field, or choose from the non-iterative properties available. Since the subject line can only support a limited amount of information, it can support whatever you choose to type and two of the non-iterative properties which are ^HostName^ and ^OverAllHlthState^. All properties listed are place holders for values at run-time. To help those properties stand out for replacement, they are all surrounded by the carrot sign: ^.
-
HostName: ^HostName^ would result in HostName: YourServerName at runtime
-
-
Content: Area where you can place iterative output. Depending on the Email Config selected, the information here is formatted accordingly. Any property surrounded by ^ will be converted to an actual value when an alert is sent.
-
“Click here for a selectable list of properties....”: Provides a graphical table of click-able properties from which to choose to include in your alerts. These properties are abbreviated, but the full text for each property is revealed by hovering over each button. Selecting any of these will cause the property to be added to the Content field where ever the cursor currently is.
Status Alerts
-
Status Alerts: Configurable drop-down box which allows the user to select 'Daily', 'Weekly', or 'Disabled' for receiving a status alert via email showing the user the current replication state. This feature is 'positive feedback' that the service is running and monitoring the Hyper-V environment.
-
Alert Time: Sets the time of day you wish to receive your status alert.
-
Day of Week: If the status alert is set to weekly, this option becomes enabled allowing you to select the day of week you would like to be alerted.
-
Alert on Start: Enables sending a 1-time alert on service start. This feature helps you when you're first configuring the service and want to be sure it is working. It can also be used as an alert for an unexpected reboot or service restart.
Application Controls
-
Import Configuration: Use to import a previously stored configuration. Many different configuration files can be saved and re-used for testing different output, email addresses, installation / re-installation. Note: Although passwords can be saved, passwords will be ignored if the configuration file is used on a different host server because they are not decryptable on any other host.
-
Export Configuration: Use to export the current configuration.
-
View Current Log: Views the current daily log for the IQ Spiral HV Replication Monitor service in Windows Notepad. The Service keeps a daily log in the <installation path>\Logs folder. Here, it keeps 30 days of daily log files.
-
Send Test Email: Used to rapidly ensure your credentials and email related settings are correct. Check your mail to ensure you got the message and it is formatted to your requirements.
-
Start Service / Stop Service: This toggle button, will read differently depending on whether the service is running. Used to conveniently stop and start the IQ Spiral HV Replication Monitor service when configuration changes are made. Any changes to the configuration file via the GUI will require a Stop and Start of the service.
-
Apply Settings: Used to commit the current settings on the screen to the current active configuration file. You can set a configuration, apply it, then export it repeatedly. Note: The service will not use the new settings until you perform a Stop Service / Start Service operation.